Piano Recital Dress in Tiffany Blue!

It’s time for another piano recital, and amazingly she still could fit into the Black dress I made for her two years ago! Looks like she’s only growing upwards but not sideways ;P  I was going to fall back on the same dress but then I stumbled upon this chiffon fabric in Spotlight (no I was NOT actually shopping for fabric), then I thought, how gorgeous it would be if it was laid over a similar colored fabric. So I just scooted over to the Cotton aisle and found this beautiful Aquamarine shade of cotton sateen. The dress pattern is a simple fitted bodice dress with a circle skirt from the book Simple+One – my source of patterns for really pretty dress. I had some difficulty hemming the chiffon though as the fabric was so thin and slippery, was so mad with my machine ;P but the results turned out pretty good, you can hardly see my lousy hemming on the chiffon.


Showing off the circle skirt.


The sash is made of taffeta, a papery satin fabric that is great for pouffy ball gowns. Her hair and the sash are covering the important bits of the zip. I must say it is one of my best efforts at sewing zips thus far. Simply because I actually hand basted the opening and the zip before sewing. :)

My favourite shot of the photoshoot.

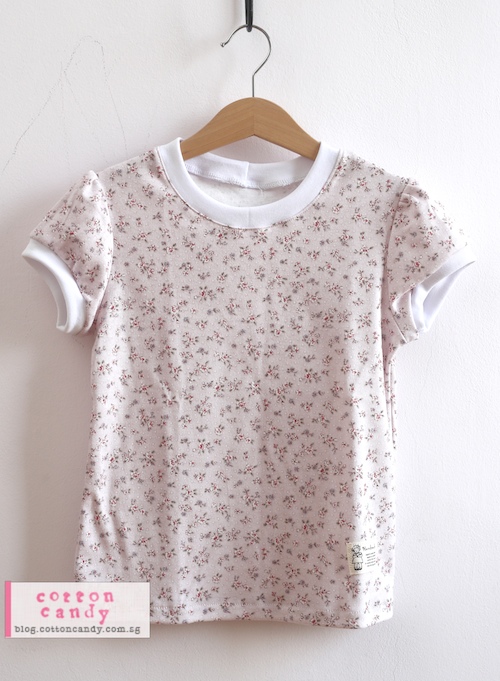
Made some T-shirts for the kids!

I bought this knit fabric from Japan a couple of years ago. It’s been sitting in my stash because I was not confident of sewing with knits yet. Thankfully it was a really easy fabric to sew. Not too thin nor too stretchy. Plus it is so so soft and comfortable! Now I remember. I bought it from the baby’s section! :P

The pattern I chose was from this book. I love the puffy sleeves detail. I had a hard time choosing the ribbed edges though. There were only plain colors available in Spotlight and I had no time to drop by Chinatown. So I had to settle for white. Didn’t turn out too bad though.

Another fabric in my stash for a long time. I was actually trying to squeeze two night dresses for kids but there wasn’t enough fabric ;P So I made two t-shirts instead.

This knit fabric was thinner but not as stretchy. Still quite light and comfortable but somehow it gets a little wrinkly. But the print is so cute! I bought this fabric from an Etsy store based in Korea – Landofoh.

October is a month of exams and therefore very little sewing. Can’t wait for the exams to  be over and maybe there will be more to show you!

School Holiday Activities – Teach your kids how to sew

Part of my birthday present to R this year – two sewing books! I bought these two books after reading the rave reviews on Amazon. I know I can teach her myself, but after seeing the preview of the books, I thought it will really help if she could read up the basics before we actually had time to sew. During the school term there is hardly any time for sewing, so despite her wanting to jump straight in, she had to wait till the school holidays came around.

So we had a one week break last week. It’s just a one week break but she’s already done two projects.

Secret message pillow

Coin Saver

She cut the patterns out herself, traced it on the fabric and cut it out and sewed it all by herself. She even asked me if the seam allowances were included! The book didn’t say, so I am assuming they were trying to keep things simple for kids. In any case, most US sewing books tend to include seam allowances.

Being paranoid, I’m still supervising her on the machine since she has a tendency to put her fingers real close to the needle. I think she feels like there is more control over the fabric, but I’m trying to change that habit because trying to move the fabric instead of guiding it through can lead to uneven stitches. After completing the cushion project, she is now quite good at pivoting around corners. The book called for an ugly whip stitch to sew up the opening for the cushion, but I taught her how to blind stitch and it looked so much better. The second project called for gluing on the velcro pieces, which I know will never hold. So I made her sew them on. Then she had to stitch around the circle and I thought it was pretty well done! I think the book includes some short cuts so that younger children will be able to complete the projects independently, so if your child is older, you can introduce more advance techniques based on his or her ability.

Next up is a skirt! The book used a trapezium shape for an A-line skirt which I thought is quite a frustrating shape to sew with. First of all, due to the widening of the side seams, the top casing can never be sewn flat properly. It would have been much better to use a simple rectangle shape to make a gathered skirt and teach them how to insert the elastic. I am thinking of scrapping the pattern altogether and using two rectangle pieces instead because she is quite disheartened after sewing how the fabric keeps bunching up. In fact, the skirt project has stalled. I hope we will have time to finish it up next weekend!

More pictures to come soon when more projects are done.

Birthday outfit for a 9 year old

My girl turned 9 yesterday, and it was customary for me to make a new dress or outfit for them. This year I chose to do something a little “older”. She still likes to wear dresses, but I realized she is outgrowing most of my books :(

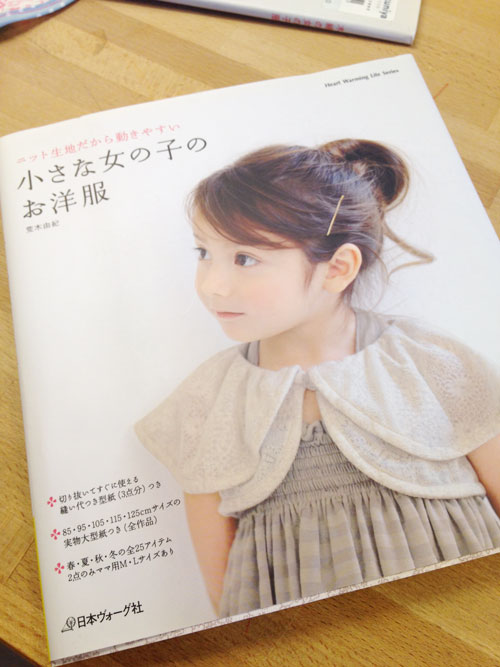
In the end I chose this – cape and camisole tunic outfit from the cover of this book below  that I can’t remember if I did a review on this book yet. But I bought it specifically for the cape on the front cover, so I better make it before she outgrows the sizes!

Front of outfit. Cape was made with nani IRO knit: peaceful cooling in AKUBI. The camisole was made of white swiss dot fabric.

Back view. I love the layers on the outfit.

One more shot of the outfit with the front button undone. I wish I took a picture of the back ribbon tie of the tunic (it’s a halter neck tie with long ribbon straps made of the same swiss dot fabric) but her hair was down and hiding it so I didn’t get a good shot.

It was a really sunny day as you can tell from the pic! We had a great birthday celebration :)


Holiday Sewing – Caps

What do you sew for a Summer holiday?

I chose to sew some new caps for the girls! The pattern is from last year’s Cucito Summer edition (in the picture below, the pink cap on left),

I even bought the prettiest fabric to go with it. It’s a Japanese strawberry patchwork print by Yuwa (I think). It was a pre-cut 50cm piece that cost me 997 yen at pretty steep exchange rates last year. Luckily, the caps did not need much fabric. Just about 30cm each (base on 110cm width) according to the pattern, but it seems like I can squeeze 3 caps out of the 50cm piece since there are leftovers after making these two.

So the fabric and pattern sat in my cupboard for a year, and finally I took them out because I was itching to sew, but didn’t have much time, and I wanted to make something fast and useful for our upcoming trip. It’s just a short trip to HK but it’s going to be hot, so a cap will come in handy.

It looks like there is some puckering at the back, but it’s actually a hidden elastic band. I followed the pattern to the tee for the first cap (the one above) and found the elastic too loose, so the stretchy effect is not quite there. I used a shorter piece of elastic for the second cap below and it seemed to fit better.  I also added unique identifiers for each kid. Different handmade labels, and different colored ribbons on the front.

I love this shot!

So, happy holidays if you are enjoying a long weekend like us in Singapore!

Girl’s Cheongsam

I haven’t posted here in a while, haha…so much for trying to post once a week :) Work has been non-stop and sewing had to take a back seat for a couple of weeks. But in the name of racial harmony day (being celebrated in both my girls’ schools this Friday). I decided to dig out this half finished, self-drafted pattern that didn’t make it in time for Chinese New Year. Ok, the truth is that it’s not a big school event and I was going to send them in the same store bought Chinese new year dress that I have been making them wear for such school events, but I suddenly realized two days ago that I had already passed down the smaller size to my niece, and the larger size now fits my little one perfectly. Which means my older girl has nothing to wear! It was a sewing emergency!

Just a little bit about this dress. It’s a qipao 旗袍 or cheongsam. A popular Chinese style dress which you can buy easily in all kinds of colors, patterns and sizes from stores especially  before Chinese new year. But I have never quite liked the tacky loud polyester types that are massed produced. So I really wanted to make a cotton fabric, easy to wear alternative for the kids. I started drafting this pattern early this year, and had to make many test patterns just to get the collar right. I think the pattern has finally come together and I’m happy with it. Will proceed to make this pattern in more sizes!

Ballet Bag

I finally got around to signing the little one up for Ballet class. Class timings are so tricky when you have two kids. I have to consider so many clashing schedules and let’s say I’ve put this off for too long. While signing her up, we needed to get her a new set of ballet gear. Then she wanted one of those standard run of the mill polyester ballet bags that they sell for at least 50 bucks each at the ballet school. No, I said, Mummy will make you one. One that is much much nicer.

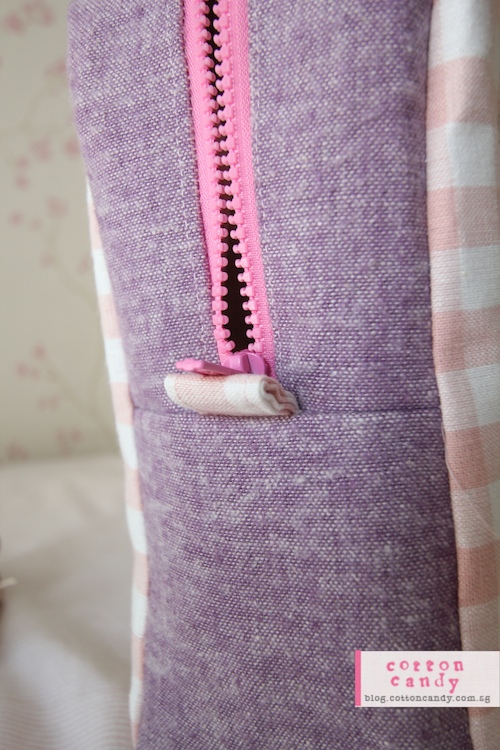
These ballet fabrics have been stashed away since my older girl was still taking lessons, which is at least 2 years ago. I bought two different colors, plus co-ordinating fabric, all waiting patiently in a pile because I never got round to signing up the little one for classes. No way will I let a polyester bag take over my joy of making this one! This was not a very easy bag to make. It was a custom size bag because I am always concerned about water bottles not standing upright and wetting all the clothes and the leather ballet shoes. So the bag had to be tall enough to fit the water bottle. The pattern was easy enough, since it was all boxy. But I wanted to make it using the heavyweight interfacing. Same one I used for my own wallet. This retains the shape very well and allows the bag to stand up on its own. But it is quite hard to sew with on a domestic sewing machine. Luckily my Janome survived. After the bag was sewn, the handles had to be sewn on by hand. Which was quite hard because of the hard interfacing. It took 4 separate sessions because my fingers get all crampy and painful after sewing each attachment. Anyway, here is the bag. I’m very pleased with it :)

Purple Frilly Dress

I have totally neglected my blog. I have been sewing for the kids, but most of the time I’ve been updating my other blog because I commit myself to a schedule and somehow that forces me to post more often. New mid-year resolution – to post here at least once a week! Or, at least if I am sewing something for the girls. There are times when I end up sewing for myself, so I can’t post that here :P

Anyway, I made this dress a few weeks ago, from a Japanese sewing book (details after the pic). It is a really pretty frilly dress that is easy to wear and comfortable too.

Back enclosure with a ribbon tie. How sweet!

Side slit pocket. My first time making this! I have made side pockets before but not with the topstitching like this. Makes it look professional (if you don’t mind my uneven stitching)

Managed to catch some shots of the girl in her new dress :)

Directions to model : put your hand in the pocket. She asked me the other day, why aren’t there two pockets? She wants two! I told her the pattern only came with one. Lol. But lesson learned. Next time I will make two. Kids love pockets!

The pattern is from this book, read the review on my other blog.

A picture of the dress. The fabric I used was purple cotton I bought from Japan, I don’t know exactly what’s the composition, something like cotton lawn. A little bit thin, but very cooling for our weather. Holds the frills up nicely too. This is good in double gauze too. I made another one for my older girl in dark blue double gauze. Will post pics next week.

New Bathrobes!

This is a project that I have put off for far too long. We have one old pink bathrobe that was bought when my older girl was 3. Now she’s 8 and the bathrobe has been passed down to her sister who is almost 5. So you can guess how short and tight it must be now. Yet it is something they use pretty often since they go swimming almost every week. So I finally got around to it :)

I used the fleece hoodie pattern that I drafted for my free tutorial. But I had to modify the front a little (done freehand). For the fabric, I decided to buy bath towels that were on sale at $8.99 each rather than by the meter because the terry fabric at Spotlight was 19.99/m!!! Furthermore the colors were not very nice and the fabric was not of very good quality. Naturally, only white and some odd colors were on sale so white was my best choice. I decided to jazz it up with some fabric scraps to prevent it from looking too plain. I used 2 bath towels per robe, and even then the sleeves had to be 3/4 length, which was fine by me because it does allow for more movement. I also added some front pockets, sewed down straps (since kids are always losing straps!) and finished all the edges with bias made from Sarah Jane’s Just stay little fabric. Ta-dah!

read more »

Chinese New Year Sewing part 2

One of the kids favourite part of Chinese New Year is receiving ang pows (red packets)! For those of you who are not familiar, these are red money packets given by the elders or married couples to kids or their juniors (who are unmarried). When the kids receive the ang pow, it is considered rude to open the packet in front of the giver, so it is always wise to carry a little bag to collect all their ang pows in. Alternatively, just hand them over to Mum :)

I made a very simple design this year. Partly because their day 1 and day 2 dresses were quite different in terms of colors, so I had to stick to a neutral palette and not mix and match too much. This fabric was a half yard 200 yen roll bargain bin find :) . It was a Cotton linen fabric so no interfacing was necessary.

 Lining and straps made out of some leftover pink with white polka dotted corduroy. There’s also a magnetic enclosure on the inside, helps to keep the ang pows in!

Made in the right size to fit red packets!